
Knowing how to change your oil is one of the most practical car maintenance skills you can pick up. It costs less than half what a shop charges, takes under an hour, and gives you direct control over your engine’s health. Most drivers either overpay at quick lube chains or wait too long between changes — both habits quietly damage the engine over time. This guide cuts through the noise and walks you through the full process, from tools to disposal.
- What You Need to Change Your Oil (Tools & Materials)
- How Often Should You Change Your Oil
- How to Change Your Oil Step by Step
- Step 1 – Warm Up and Prepare the Vehicle
- Step 2 – Raise the Vehicle and Position the Drain Pan
- Step 3 – Remove the Drain Plug and Drain the Oil
- Step 4 – Remove and Replace the Oil Filter
- Step 5 – Reinstall the Drain Plug
- Step 6 – Add New Oil
- Step 7 – Run Engine and Check for Leaks
- Step 8 – Check Oil Level with the Dipstick
- How to Dispose of Used Motor Oil
- Benefits of Changing Your Own Oil
- Conclusion
- FAQs
What You Need to Change Your Oil (Tools & Materials)
No specialized workshop needed. These are the essentials:
| Item | Purpose |
| New oil filter | Replace the clogged filter with each change |
| Motor oil (4–5 quarts) | Refills the engine; check the owner’s manual for grade |
| Socket wrench | Removes and torques the drain plug |
| Oil filter wrench | Loosens a tight filter |
| Drain pan / catch pan | Collects old oil beneath the vehicle |
| Funnel | Directs new oil into the fill hole cleanly |
| Rags | Wipes plug, hands, spills |
| Car ramp or jack stands | Raises the vehicle for undercarriage access |
Check your owner’s manual before buying oil. The grade and viscosity vary by engine — using the wrong spec can reduce lubrication efficiency. Most filters are inexpensive, but make sure they match your year, make, and model.
One often-overlooked item: a spare sealing washer for the drain plug. Some are reusable, some aren’t. Having one on hand avoids a last-minute leak.
How Often Should You Change Your Oil
The 3,000-mile rule is outdated. It served quick lube shops well — more visits meant more revenue — but modern engines and oil formulations have moved far past that benchmark.
Most vehicles today can comfortably run 5,000 miles between changes. Some, particularly those running full synthetic motor oils, can stretch to 7,500 or even 12,000 miles. The actual interval depends on your driving habits, engine age, and oil type.
The only reliable reference point: your owner’s manual. It lists the manufacturer-specified interval based on your actual engine — not a generic estimate designed to bring you in more often.
General intervals by oil type:
| Oil Type | Typical Change Interval |
| Conventional | 3,000–5,000 miles |
| Synthetic blend | 5,000–7,500 miles |
| Full synthetic | 7,500–12,000 miles |
If you do a lot of short trips, tow frequently, or drive in extreme temperatures, lean toward the shorter end regardless of oil type.
How to Change Your Oil Step by Step
Step 1 – Warm Up and Prepare the Vehicle
Cold oil drains slowly and leaves residue behind. Drive for five to ten minutes first — enough to warm the oil without making it dangerously hot. A good rule: if the heater blows warm air, the oil temperature is about right.
Park on a flat surface and engage the parking brake. Place wheel blocks behind the rear tires if you’re using a ramp. This isn’t optional — a rolling car mid-drain is a serious hazard.
Step 2 – Raise the Vehicle and Position the Drain Pan
Drive onto the car ramp or jack up the front end and secure it on jack stands. Never work under a vehicle supported only by a floor jack.
Slide the catch pan under the oil pan before touching anything. Position it slightly forward of the drain plug — oil tends to arc outward when it first starts flowing.
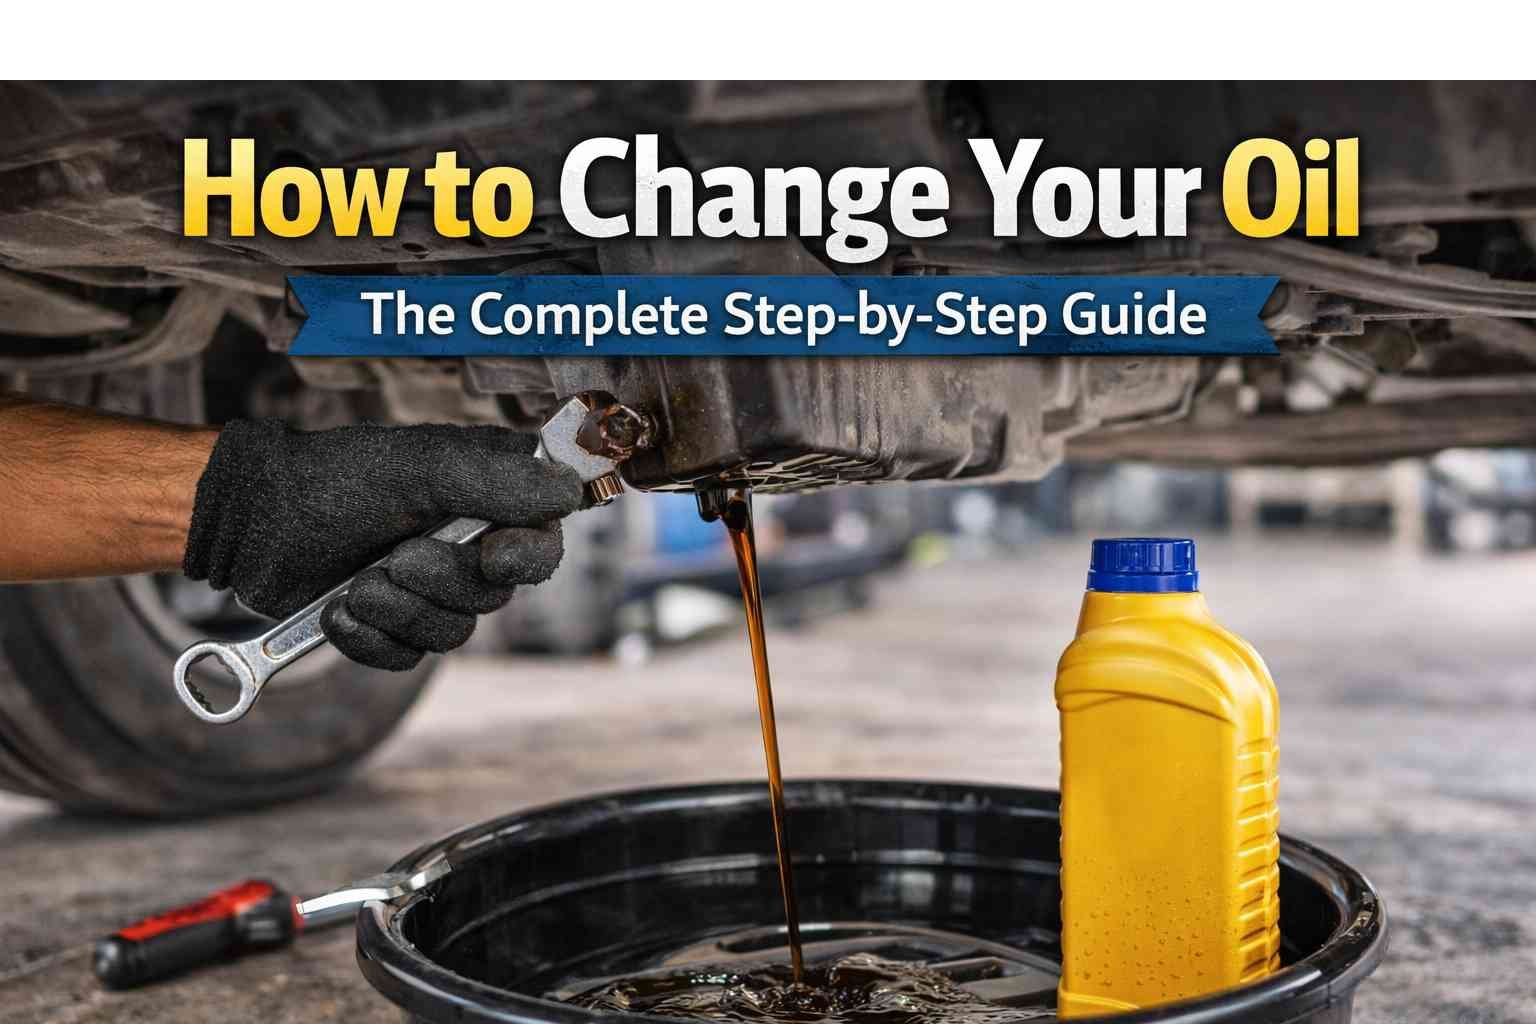
Step 3 – Remove the Drain Plug and Drain the Oil
Use a socket wrench to loosen the drain plug counterclockwise. Once it’s loose enough, switch to fingers — this gives you better control for the final removal.
Keep a firm grip on the plug as it comes free. Hot oil will follow immediately. Let the oil drain completely; most engines take about two minutes. While it drains, wipe down the plug threads and inspect them for wear. Replace the sealing washer now if it looks flattened or damaged.
Caution: Freshly drained oil can be very hot. Avoid direct skin contact.
Step 4 – Remove and Replace the Oil Filter
The filter location varies — it could be on the side, bottom, or rear of the engine block. Look for a cylinder about the size of a small can.
Unscrew it by hand if possible. If it won’t budge, use the oil filter wrench. Before it comes fully off, position the drain pan beneath it — the filter holds residual oil that will spill.
Once removed, check that the old O-ring isn’t still stuck to the engine mounting plate. A double-stacked O-ring causes leaks no matter how tight the new filter is.
Apply a thin film of fresh motor oil around the rubber gasket ring of the new filter. This helps it seat properly and makes future removal easier. Thread it on by hand until the gasket contacts the mounting plate, then give it three-quarters of a turn more. Don’t use the wrench to tighten — hand pressure is enough.
Step 5 – Reinstall the Drain Plug
Thread the drain plug back in by hand first to avoid cross-threading. Tighten with the socket wrench to the manufacturer-specified torque — this is listed in your owner’s manual. Over-tightening strips the threads; under-tightening causes drips.
Step 6 – Add New Oil
Move to the top of the engine. Remove the oil filler cap — usually marked with an oil can symbol. Place the funnel in the opening and pour in the correct volume of new oil. Most cars take 4–5 quarts, but verify in the owner’s manual.
Replace the filler cap securely. A loose cap can spray oil under the hood once the engine starts.
Step 7 – Run Engine and Check for Leaks
Start the engine and let it idle for about 30 to 60 seconds. Watch the oil pressure warning light — it should go off within a few seconds as pressure builds.
While it runs, crouch down and look at the drain plug and oil filter areas. Any dripping means something isn’t sealed. Stop the engine immediately if you see a leak, then tighten as needed.
Step 8 – Check Oil Level with the Dipstick
Shut off the engine and wait 30 seconds for the oil to settle back into the pan. Pull the dipstick, wipe it clean with a rag, reinsert it fully, then pull it again.
The oil film should sit between the two marks on the dipstick’s operating range. If it reads low, add oil in small amounts — a quarter quart at a time — and recheck. Overfilling is just as harmful as running low.
How to Dispose of Used Motor Oil
Pouring used motor oil down a drain, into soil, or into regular trash is illegal in most states and causes serious environmental damage. One quart can contaminate up to 250,000 gallons of groundwater.
The simplest solution: pour the drained oil into sealed milk jugs or any clean container with a tight lid. Drop them off at a nearby quick lube, auto parts store, or gas station. Under most state laws, these facilities are required to accept used motor oil from consumers, often at no charge.
Take the old oil filter too — many collection points accept it alongside the oil.
Benefits of Changing Your Own Oil
The financial case is straightforward. A shop visit typically runs $25–$30, with roughly half going to labor. Doing it yourself costs around $15 for oil and a filter — sometimes less if you buy in bulk or catch a sale.
Over a year with three or four oil changes, that gap adds up to real money.
Beyond cost, you gain something harder to quantify: direct knowledge of your vehicle’s condition. Every time you’re underneath the car, you have the chance to spot worn components, leaks, or early signs of trouble before they become expensive repairs.
Conclusion
Changing your oil is a low-cost, high-return maintenance habit. Once you’ve done it twice, the whole process takes less than 30 minutes. Following your owner’s manual for the correct oil grade and change interval — rather than defaulting to the outdated 3,000-mile rule — keeps the engine running efficiently for far longer. Pair the oil change with a quick visual inspection each time, and you’re ahead of most drivers on vehicle care.
FAQs
How often should I change my oil?
It depends on your oil type and driving conditions. Conventional oil: every 3,000–5,000 miles. Full synthetic: up to 12,000 miles. Your owner’s manual gives the most accurate interval for your specific engine.
What type of oil does my car need?
Check your owner’s manual for the correct viscosity grade — typically listed as something like 5W-30 or 0W-20. Using the wrong oil grade can reduce engine lubrication and void warranties on newer vehicles.
Can I change my oil without a lift or ramp?
Yes, if there’s enough ground clearance to slide underneath. A set of jack stands provides safe access. Never work under a vehicle held only by a floor jack — always use stands for support.
What happens if I don’t change my oil?
Old oil breaks down and turns to sludge, reducing lubrication across engine components. This accelerates engine wear, raises operating temperatures, and can eventually cause overheating or significant internal damage.
How do I know if my oil filter needs replacing?
Replace the oil filter at every oil change — it’s not optional. A clogged filter restricts flow and reduces oil pressure. If you notice residue around the mounting plate or a persistent leak at the filter, inspect the O-ring and seating surface.
Where can I dispose of old motor oil?
Most quick lube shops, auto parts retailers, and gas stations accept used motor oil for free or a small fee. Check your state’s recycling guidelines — illegal dumping carries fines in addition to the environmental damage it causes.